Introduction:
This is a paragraph.
The humble chicken breast might not look like much on your plate, but it’s been my secret weapon in the battle of the bulge for nearly two decades of helping clients achieve their weight loss goals. As a lean protein powerhouse that’s both versatile and budget-friendly, chicken has earned its spot as the go-to protein for anyone looking to shed pounds while staying satisfied. I’ve experimented with countless weight loss strategies over the years, but I keep coming back to chicken as a cornerstone of successful, sustainable weight management. Let me share why this kitchen staple could be exactly what you need to transform your weight loss journey in 2025.
Key Benefits
Let me share what I’ve learned about using chicken for weight loss over years of helping people with meal planning and my own health journey.
You know what’s funny? I used to think chicken breast was the most boring food on the planet. Every time I’d meal prep, I’d stare at those plain white pieces of meat and wonder how anyone could eat this day after day. But man, was I doing it wrong! After experimenting with different cooking methods and seasonings, chicken became my secret weapon for dropping those stubborn pounds.
Here’s the real deal about chicken and weight loss – it’s all about that protein-to-calorie ratio. When you’re trying to shed weight, you need foods that keep you full without breaking your calorie bank. A 3-ounce serving of chicken breast packs a whopping 26 grams of protein for just 140 calories. That’s basically like getting the protein of four eggs for fewer calories than two! And since protein takes more energy to digest than carbs or fats, you’re actually burning more calories just by eating it.
One of my favorite discoveries was how chicken helps prevent those afternoon snack attacks. I remember this one time when I was swamped with work and had my usual salad – but without chicken. By 3 PM, I was raiding the pantry like a hungry bear. The next day, I added just 4 ounces of grilled chicken to the same salad, and somehow made it through the whole afternoon without even thinking about snacks. That’s the power of protein-induced satiety!
Let’s talk versatility because this is where chicken really shines. After countless kitchen experiments (and yes, some memorable failures), I’ve found you can make it taste completely different every day of the week. One trick I stumbled upon is using different spice combinations – Italian seasoning for Monday’s meal prep, Mexican spices for Tuesday’s fajita bowls, and Chinese five-spice for Wednesday’s stir-fry. The zero-carb nature of chicken means you can pair it with literally any vegetable or healthy carb without worrying about overdoing it.
The science behind chicken’s weight loss benefits is pretty fascinating. Your body has to work harder to digest protein compared to other nutrients, which means you’re burning more calories during digestion – it’s called the thermic effect of food. Plus, that protein helps preserve muscle mass while you’re in a calorie deficit, which keeps your metabolism running strong. I’ve seen this play out with clients who switched from carb-heavy lunches to chicken-based meals – their energy levels stabilized, and the weight started coming off more consistently.
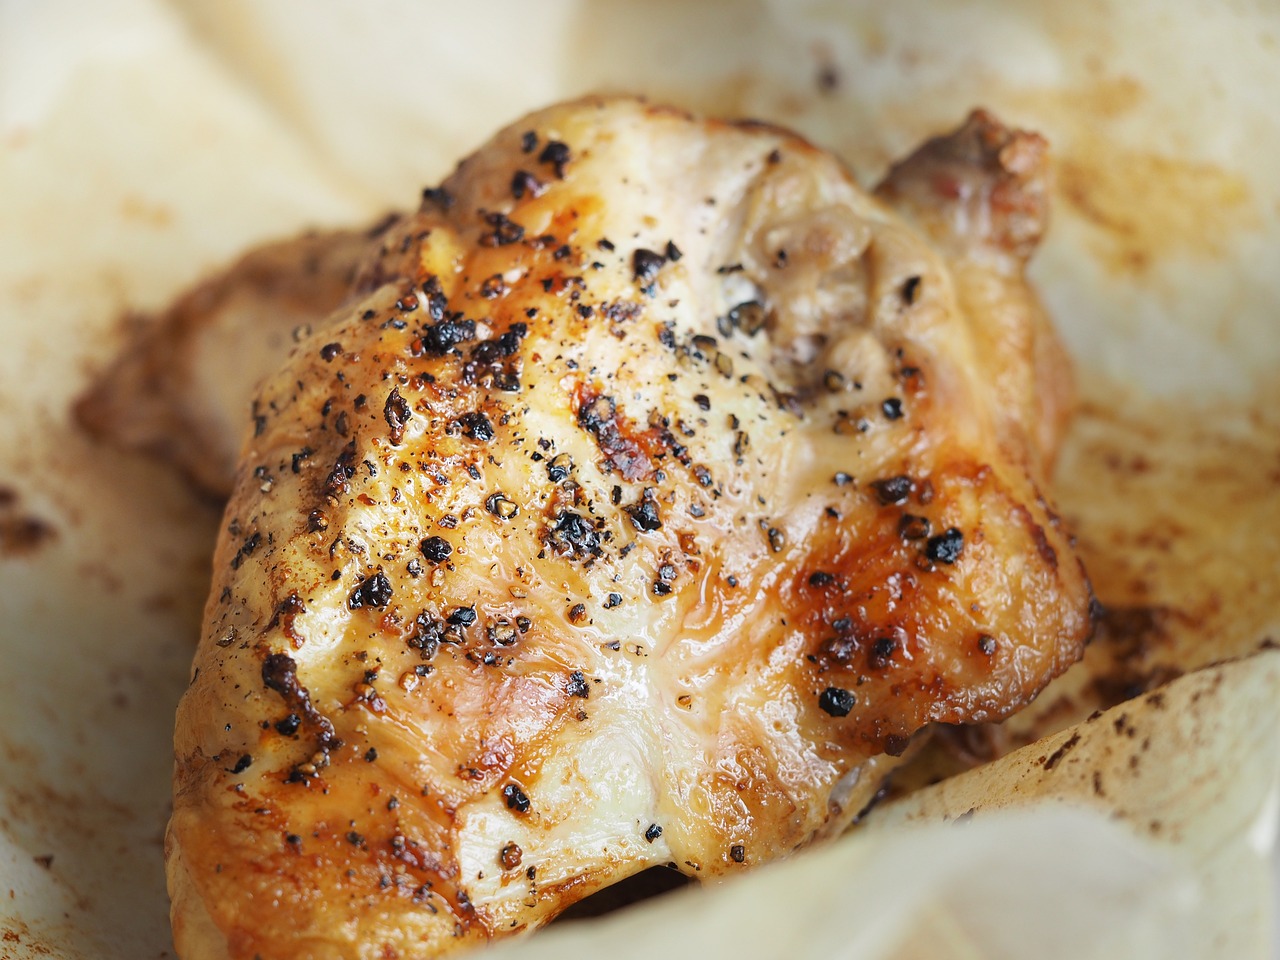
Here’s a pro tip I learned the hard way: don’t always cook your chicken the same way. Grilling, baking, air frying, and poaching each bring out different flavors and textures. And please, for the love of good food, invest in a meat thermometer! Nothing ruins your weight loss motivation quite like repeatedly eating overcooked, dry chicken breast. The sweet spot is 165°F (74°C) – any higher and you’re headed for rubber chicken territory.
Remember, the key to using chicken for weight loss isn’t just about eating it – it’s about making it a delicious part of your sustainable healthy eating plan. When you nail the cooking techniques and find your favorite seasonings, you won’t even feel like you’re on a “diet.”
Best Preparations
Let me tell you about my journey discovering the best ways to prepare chicken – trust me, I’ve made every mistake possible so you don’t have to!
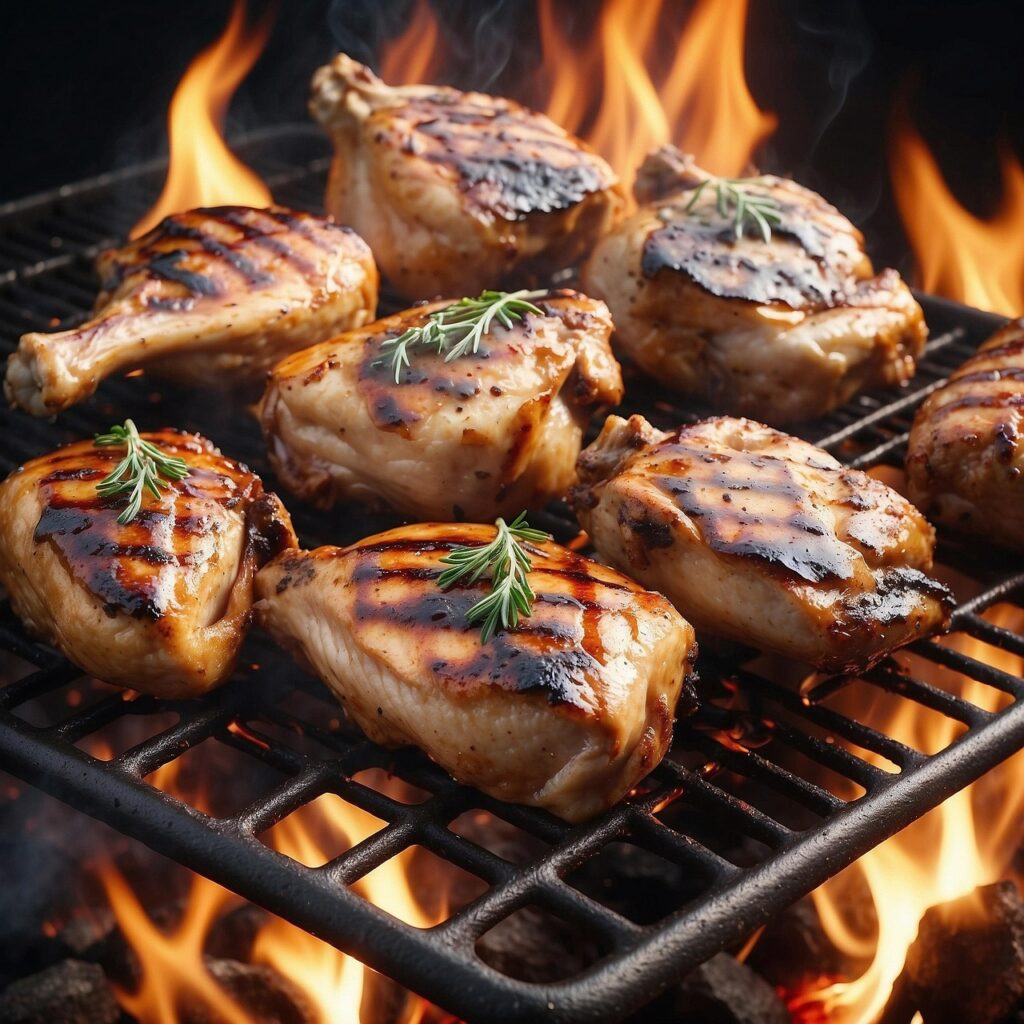
The absolute game-changer for me was learning how to grill chicken properly. I used to just slap it on the grill and hope for the best, which usually meant chicken that was charred on the outside and somehow still raw in the middle. Then I discovered the “two-zone grilling” method, where you sear it over high heat (around 450°F) for about 3-4 minutes per side, then move it to the cooler side of the grill to finish cooking. Total revelation! The result is this perfectly juicy chicken with those awesome grill marks everyone loves.
Baking chicken was my go-to method during my meal prep phase, and I learned some crucial tricks. The magic temperature is 375°F – not too hot, not too cool. But here’s what really made a difference: brining the chicken first. Just 30 minutes in a simple salt water solution (1 tablespoon salt per cup of water) makes such a huge difference in moisture retention. I also started using a baking rack over my sheet pan, which lets hot air circulate all around the chicken. No more soggy bottoms!
When I first got an air fryer, I was skeptical about using it for chicken. Boy, was I wrong! It’s become my favorite method for cooking chicken when I’m short on time. The key is to not overcrowd the basket – give those pieces some breathing room. A light spray of olive oil, your favorite seasonings, and 12-15 minutes at 375°F gives you this incredibly crispy outside while keeping all the juices locked inside. Just remember to flip halfway through.
Poaching chicken used to seem so bland to me, until I learned to treat the poaching liquid like a flavor foundation. Now I add aromatics like garlic, ginger, bay leaves, and peppercorns to the water. Sometimes I even use chicken broth instead of water – total game changer! The trick is to never let the liquid come to a full boil. Keep it at a gentle simmer (tiny bubbles, not big ones) and you’ll get the most tender chicken ever.
Let’s talk about my absolute favorite discovery: slow cooking chicken. There was this one time I forgot about a chicken in the slow cooker (oops!) and came back six hours later expecting disaster. Instead, I found the most incredibly tender, fall-apart chicken I’d ever made. The secret is to not add too much liquid – just enough to cover the bottom of the pot. Your chicken will release its own juices as it cooks. I love throwing in some lemon slices, herbs, and garlic, then letting it go on low for 6-8 hours.
Temperature control is absolutely crucial no matter which method you choose. I learned this the hard way after serving undercooked chicken at a dinner party (not my proudest moment). Get yourself a good meat thermometer and aim for that magic 165°F internal temperature. I actually pull my chicken off at 160°F and let it rest for 5-10 minutes – it’ll reach 165°F from residual heat and stay juicier.
One mistake I see people make repeatedly is not letting their chicken come to room temperature before cooking. Take it out of the fridge about 20-30 minutes before you plan to cook it. This helps it cook more evenly and prevents that dreaded raw middle/overcooked outside situation. Just don’t leave it out for more than 30 minutes – food safety first!
Remember, the best preparation method is ultimately the one that fits your lifestyle and cooking comfort level. Start with one method, master it, then branch out to try others. Your chicken game will level up in no time!
Portion Guidelines
Let me share what I’ve learned about chicken portion control after years of helping people with their meal plans and tracking my own protein intake.
You know what drove me nuts when I first started measuring portions? Those vague “palm-sized” recommendations everywhere. After lots of trial and error (and an embarrassing amount of time with my food scale), I’ve found that 4-6 ounces of chicken per meal is the sweet spot for most people. That’s about the size of a standard deck of cards plus a little extra – way more practical than trying to guess what “palm-sized” means!
Timing your chicken servings throughout the day makes a huge difference in how you feel. I learned this the hard way after trying to cram all my protein into dinner – hello, midnight hunger pangs! Now I aim for 2-3 servings spread across different meals. Usually, that means about 5 ounces at lunch and another 5 at dinner, with maybe a smaller 4-ounce portion in a post-workout meal if I’m training that day.
Speaking of workouts, let’s talk about pre and post-exercise chicken timing. Through lots of experimentation (and some pretty uncomfortable training sessions), I’ve found that eating chicken about 2-3 hours before a workout is ideal. Your body has time to digest it, but you’re still powered by that protein. Post-workout, try to get some chicken in within 1-2 hours – your muscles are like sponges during this time, ready to soak up all that protein for recovery.
Storage has been a game of trial and error for me. One time, I made the rookie mistake of meal prepping seven days’ worth of chicken at once – by day five, it was about as appetizing as cardboard. Now I stick to a 3-4 day maximum for cooked chicken in the fridge (at 40°F or below). If you’re batch cooking more than that, portion it out and freeze the rest immediately. Those vacuum-sealed bags are worth every penny for preventing freezer burn!
Here’s a pro tip about meal timing that changed everything for me: if you’re having chicken for dinner, cook a little extra and slice it cold for lunch the next day. Cold chicken actually has a firmer texture that works great on salads, and you’re more likely to stick to proper portions when you’re not starving and cooking from scratch.
Let’s talk about the real-world application of these portions. If you’re using chicken for weight management, those 4-6 ounce portions translate to about 25-35 grams of protein per serving. For most adults, that’s roughly a third of your daily protein needs per meal. I started measuring strictly with a food scale, but eventually got pretty good at eyeballing it. Though I still break out the scale when I’m being strict with my nutrition goals.
One mistake I see people make is not accounting for cooking shrinkage. A 6-ounce raw chicken breast will typically shrink to about 4.5 ounces after cooking. If you’re tracking your portions, weigh your chicken raw if your nutrition facts are for raw chicken, or cooked if they’re for cooked chicken. The difference can really add up over time!
Temperature control during storage is super important too. Don’t let cooked chicken sit out for more than two hours (one hour if it’s over 90°F outside). I learned this lesson after a rather unpleasant experience with some chicken I’d left in my gym bag after meal prep. Now I always pack my chicken lunches with an ice pack, even in winter. Better safe than sorry!
Remember, these guidelines are just starting points. Some people might need more or less based on their size, activity level, and goals. The key is to be consistent with your portions and listen to your body’s hunger and fullness signals.
Common Mistakes
I’ve seen (and honestly made) just about every chicken-preparation mistake in the book throughout my years of cooking and teaching others about healthy meal prep. Let me share some hard-learned lessons that’ll save you from the same pitfalls.
The breading and frying trap is one I fell into hard when I first started “eating healthy.” There I was, proud of choosing chicken over red meat, but coating it in breadcrumbs and dunking it in oil completely defeated the purpose! One piece of fried chicken can pack over 400 calories – almost triple what the same portion would be if grilled or baked. I’ve found that using herbs and spices, along with a quick spray of olive oil in the air fryer, gives you that satisfying crunch without turning your healthy protein into a calorie bomb.
Portion distortion is something I see all the time, especially at restaurants. I remember measuring out what I thought was a normal chicken breast from my local deli, and it turned out to be nearly 12 ounces – that’s double what most people need in one sitting! The problem is, we get used to these huge portions and start recreating them at home. I started cutting my chicken breasts in half horizontally before cooking, which not only gives you proper portions but also helps them cook more evenly.
Let’s talk about the seasoning situation because this is where so many people go wrong. I cringe thinking about my early days of plain, boiled chicken breast (sorry to anyone I served that to!). Properly seasoned chicken doesn’t mean drowning it in high-calorie sauces. I’ve learned that a mix of dried herbs, garlic powder, paprika, and a little black pepper can transform your chicken completely. Plus, letting the seasoned chicken sit for about 30 minutes before cooking lets those flavors really penetrate the meat.
Cross contamination is probably the most serious mistake I see, and it’s often subtle. Here’s a perfect example: using the same cutting board for your chicken and your salad veggies without properly sanitizing in between. Or my personal facepalm moment – using the same tongs to put raw chicken on the grill and then to take it off when cooked. Now I use a simple system: red handles for raw chicken tools, black handles for cooked chicken tools. No more confusion!
Storage mistakes can turn perfectly good chicken into a science experiment gone wrong. The worst offense I see is people leaving cooked chicken out on the counter to “cool down” for hours before refrigerating. I did this once during a busy meal prep Sunday and had to throw out an entire batch – such a waste! The right way is to portion hot chicken into shallow containers so it cools quickly, then refrigerate within two hours (or one hour if it’s a hot day).
Temperature control in storage is another big one. Your refrigerator should be set at or below 40°F (4°C), and your freezer at 0°F (-18°C). I keep a thermometer in both just to be sure. One time my fridge was running warm, and I didn’t realize until my carefully prepped chicken spoiled way before it should have. Now I check those temps regularly.
One mistake that really bugs me is when people thaw chicken on the counter at room temperature. This is basically creating a bacteria playground! Instead, thaw it in the fridge (plan ahead – it takes about 24 hours for a typical breast), or if you’re in a hurry, use the cold water method, changing the water every 30 minutes.
The key to avoiding these mistakes is being mindful and developing good habits. Start with proper food safety, then work on your portion control and seasoning game. Trust me, your taste buds and your health goals will thank you!

Smart Tips
Let me share some game-changing chicken prep tips I’ve picked up over years of cooking and teaching healthy meal prep classes.
You know what’s crazy? I used to leave the skin on my chicken thinking it added “necessary moisture.” Big mistake! After actually testing this theory, I discovered properly cooked skinless chicken can be just as juicy, with about 50 calories less per serving. The trick is to remove the skin before cooking, but don’t just yank it off – use a paper towel for grip and gently pull against the grain. This prevents you from tearing the meat underneath.
Trimming fat used to be my least favorite kitchen task until I figured out the right technique. One of my biggest “aha” moments was realizing that slightly frozen chicken (about 15 minutes in the freezer) is way easier to trim than completely thawed chicken. The fat becomes more visible and firmer, making it simple to remove with a sharp knife. Just look for those whitish-yellow bits along the edges and in between muscles.
Here’s something that revolutionized my lean chicken game: marinating isn’t just for flavor – it’s a science! After ruining countless chicken breasts with overly acidic marinades (hello, rubber chicken), I learned that the perfect marinade needs a balance of acid (like lemon juice), oil (just a touch), and seasonings. The magic ratio I swear by is 2 tablespoons acid, 1 tablespoon oil, and 1-2 tablespoons of herbs/spices per pound of chicken. And contrary to what I used to think, marinating longer isn’t better – 30 minutes to 2 hours is the sweet spot.
Batch cooking changed my whole relationship with healthy eating. But there’s an art to it that I had to learn through trial and error. The secret is to slightly undercook the chicken (pull it at 160°F instead of 165°F) if you’re planning to reheat it later. This prevents that dreaded dry, chewy texture when you warm it up. I also discovered that cutting chicken AFTER reheating keeps it juicier than pre-slicing it during prep.
Let’s talk about portion measuring because this is where a lot of people get tripped up. I invested in a food scale (best $15 I ever spent!), and here’s what shocked me: what I thought was a 4-ounce portion was actually closer to 7 ounces! Now I use this simple system: I weigh my portions raw (since that’s what most nutrition labels are based on), then write the weight on my storage containers with a dry-erase marker.
Temperature control during batch cooking is super important. I learned the hard way that you can’t just stack hot chicken in deep containers and throw them in the fridge. Now I spread my cooked chicken on a baking sheet to cool for about 10-15 minutes before portioning it out. This prevents that weird steam effect that can make your chicken rubbery.
One trick I stumbled upon for keeping batch-cooked chicken moist: save those cooking juices! When you reheat your portions, add a spoonful of the reserved juice to your container. It’s like giving your chicken a second life, and it tastes way better than adding water.
The most valuable tip I can share about portioning is to prep your chicken based on your typical meals. If you usually need 5 ounces for lunch salads, cut and portion exactly that amount. This eliminates decision fatigue and makes it super easy to grab and go. I actually label my containers with the meal they’re intended for – total game changer for staying on track!
Remember, these smart prep methods aren’t just about being healthy – they’re about making your life easier while keeping your food delicious. When you nail these techniques, meal prep becomes almost automatic!
Conclusion:
Choose skinless breast, 4-6oz portions, grilled or baked.