Introduction:
This is a paragraph.
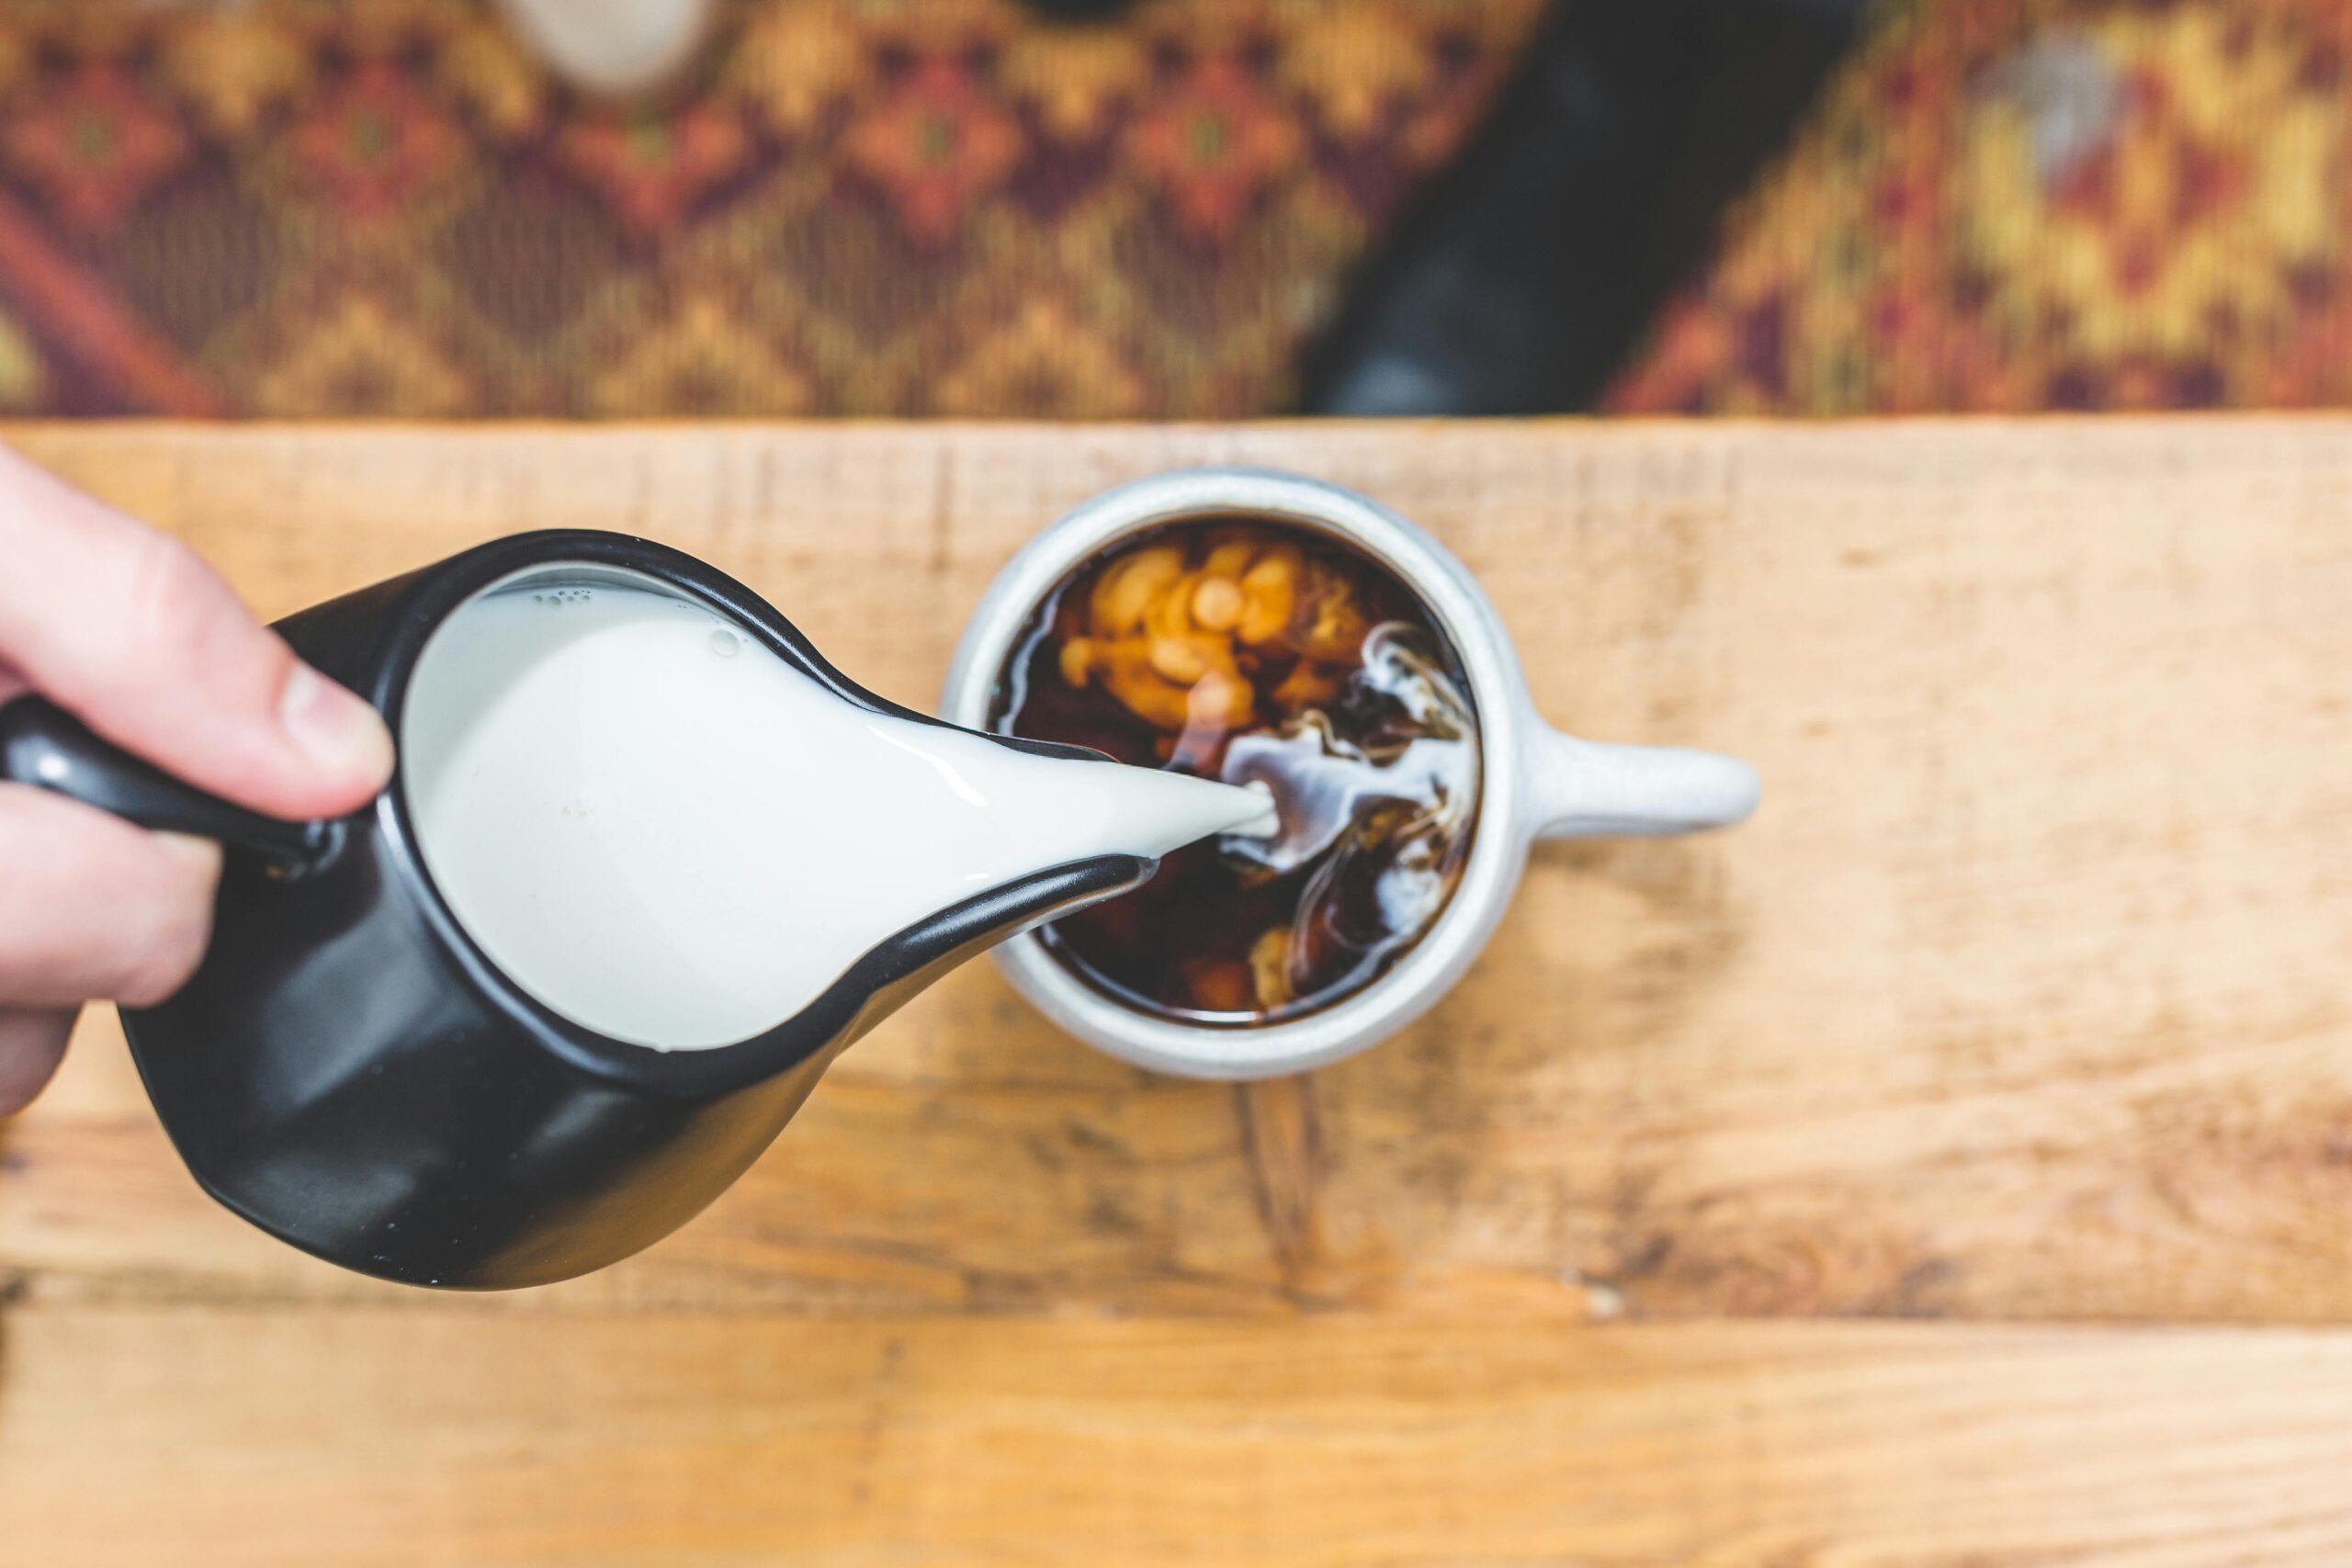
Studies show switching to healthier coffee creamers can save up to 100 calories per cup. Let’s examine the best options for weight loss.
Best Low-Calorie Creamer Options
Here’s a detailed, experience-based guide to low-calorie coffee creamers:
My Quest for the Perfect Healthy Creamer: What Actually Works
Let me tell you about my journey to find a better coffee creamer. After realizing my favorite vanilla creamer was basically a dessert in disguise (35 calories per tablespoon!), I embarked on a mission to find alternatives that wouldn’t wreck my daily calorie goals but still made my coffee enjoyable.
The Almond Milk Adventure
I started with almond milk, and wow, was there a learning curve! Not all almond milk creamers are created equal – trust me on this one. After trying countless brands, I discovered that barista versions are actually worth the extra money. They’re specifically formulated to avoid separating in hot coffee, which was a game-changer after dealing with those weird floating almond milk particles.
My top findings about almond milk creamers:
– Calories typically range from 10-15 per tablespoon
– Barista blends contain around 0.5g more fat for better mouthfeel
– Some brands add pea protein for extra creaminess
– Temperature matters – cold almond creamer in hot coffee often curdles
Sugar-Free Discoveries
The sugar-free creamer world was quite the adventure. My first attempts with some artificial sweeteners left a weird aftertaste that lingered all morning. But then I found ones sweetened with monk fruit and allulose – total game changers! They actually taste sweet without that chemical aftermath.
Favorite sugar-free options I’ve tested:
– Monk fruit sweetened versions (about 5 calories per tablespoon)
– Stevia/erythritol blends (nearly zero calories)
– Natural sugar-free vanilla flavors
– Unsweetened options you can customize yourself
Natural Creamer Solutions
Here’s something that surprised me – some of the best natural creamers aren’t even marketed as creamers! I discovered that cashew milk blended with a tiny pinch of sea salt creates this incredibly creamy texture. Plus, it’s super easy on the stomach compared to some processed options.
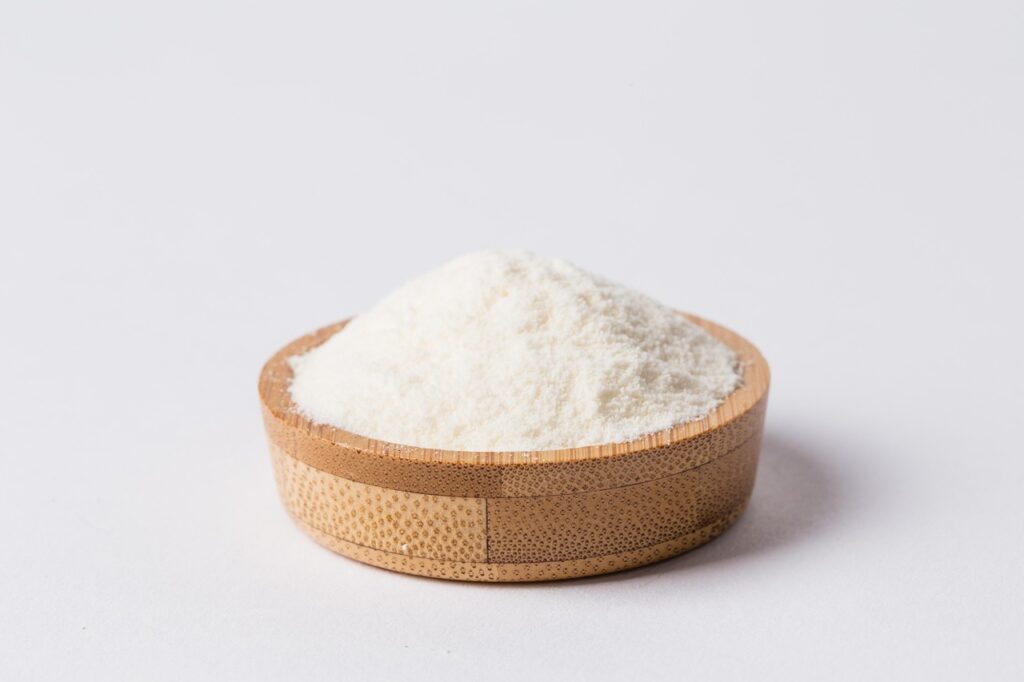
Plant-Based Breakthroughs
My biggest revelation came when experimenting with oat milk creamers. Unlike some other plant-based options, oat milk has this natural sweetness and creaminess that really works in coffee. The key is finding brands that don’t add tons of oils and sugars.
Some successful plant-based combinations I’ve found:
– Oat and coconut milk blends (about 15 calories per tablespoon)
– Pea protein enhanced versions for extra creaminess
– Hemp milk creamers (great source of omega-3s)
– Macadamia milk options (super creamy but pricier)
Protein-Packed Options
This was a total accident – I was trying to increase my protein intake and discovered protein-enriched creamers. Some brands add casein or pea protein, which not only makes the coffee creamy but also adds 2-3g of protein per serving.
Storage and Freshness Tips
After wasting money on creamers gone bad, I’ve learned some crucial storage tips:
– Most natural options last 7-10 days after opening
– Keep them in the back of the fridge, not the door
– Check for separation and smell before using
– Don’t let them sit out during your whole morning routine
The Real Talk on Taste
Let’s be honest – nothing quite matches the taste of full-fat dairy creamer. But these alternatives get pretty close, and your taste buds do adjust after a couple of weeks. I actually prefer some of these options now and find traditional creamers too sweet.
Making the Switch
Start with a 50/50 mix of your regular creamer and the new option. This helps your taste buds adjust gradually. I learned this after trying to switch cold turkey and hating my coffee for a week!
My current go-to recipe:
– 2 tablespoons barista oat milk
– 1/2 tablespoon sugar-free vanilla creamer
– Tiny pinch of cinnamon
– Total calories: about 20
Remember, finding your perfect low-calorie creamer might take some experimentation. Keep trying different options until you find one that makes your morning coffee something you still look forward to. And don’t forget to check the nutrition labels – some “healthy” options can be surprisingly high in calories!
Ingredients to Watch
Here’s an honest look at what’s really in our coffee creamers:
The Eye-Opening Truth About Creamer Ingredients: What I Found After Actually Reading Labels
Let me tell you about the day I finally sat down and researched what was actually in my favorite coffee creamer. I had been using this “sugar-free” version for months, thinking I was making a healthy choice. Spoiler alert: I was in for quite a surprise!
The Sugar Situation: It’s Hiding Everywhere
You wouldn’t believe how sneaky sugar can be in creamers. After examining countless labels, I’ve learned to spot sugar’s many disguises. Here’s what I found lurking in “sugar-free” creamers:
– Corn syrup solids (often the first ingredient!)
– Dextrose (just another name for glucose)
– Maltodextrin (can spike blood sugar even higher than table sugar)
– “Natural flavors” (sometimes contain hidden sugars)
The Artificial Sweetener Story
Oh boy, this was a big learning curve for me. After experiencing headaches with one sugar-free creamer, I started investigating artificial sweeteners more closely. What I discovered about different sweeteners:
– Sucralose often leaves a lingering aftertaste
– Aspartame can break down in hot coffee
– Acesulfame-K is usually combined with other sweeteners
– Stevia extracts vary wildly in quality and taste
The Truth About Fats
Here’s what shocked me about fat content – some “light” creamers actually contain more heavily processed oils than their full-fat counterparts. I started comparing fat sources:
Regular Creamers:
– Heavy cream (natural but high-calorie)
– Coconut cream (medium-chain triglycerides)
– Natural oils
“Light” Creamers:
– Hydrogenated oils (yikes!)
– Palm oil (environmental concerns)
– Modified corn oil
Those Mysterious Additives
Let me share what I found after researching those unpronounceable ingredients:
– Carrageenan (can cause digestive issues)
– Dipotassium Phosphate (preservative)
– Sodium Caseinate (a milk derivative)
– Mono and Diglycerides (processed fats)
The Real Nutritional Value
After tracking my creamer use for a month, I realized something important about nutritional content. Many creamers list unrealistically small serving sizes (who uses just one tablespoon?). Here’s what I found in my typical morning coffee amount (3 tablespoons):
– Calories: 70-150 depending on brand
– Sugar: 5-15g even in “sugar-free” versions
– Fat: 2-7g
– Protein: Usually less than 1g
Preservatives and Shelf Life
You know what made me pause? Realizing that my creamer could sit unopened in my pantry for months. Natural cream wouldn’t last a week! Here’s what keeps these creamers “fresh”:
– Sodium Stearoyl Lactylate
– Potassium Sorbate
– Silicon Dioxide
– Polysorbate 60
Color and Flavor Additives
I started paying attention to why my vanilla creamer looked so… vanilla. Turns out, these are common color and flavor enhancers:
– Annatto (for color)
– “Natural and Artificial Flavors”
– Caramel Color
– Titanium Dioxide (for whiteness)
Reading Labels Like a Pro
Here’s my current checklist when evaluating creamers:
– Check the first three ingredients (where most sugars hide)
– Look for serving size tricks
– Scout for artificial sweeteners
– Identify oil sources
– Check for common allergens
– Verify protein content claims
The Better-Choice Guidelines
After all this research, I’ve developed some personal rules:
– No hydrogenated oils
– Limited or no carrageenan
– Real food ingredients I can pronounce
– No artificial colors
– Natural sweeteners when possible
Remember, even “natural” creamers can contain questionable ingredients. I’ve learned to be especially wary of claims like “healthy,” “sugar-free,” and “all-natural” – these terms aren’t strictly regulated and can be misleading.
I now keep a small notebook of brands and ingredients I’ve researched (yes, I’m that person in the coffee aisle taking notes!). It’s helped me make better choices and understand what I’m actually putting in my coffee every morning.
The most important lesson? Just because something is marketed as healthy doesn’t mean it is. Take the time to read those labels and understand what you’re consuming with your morning brew!
Portion Control Guidelines
Here’s my real-world guide to creamer portion control:
Right-Sizing Your Coffee Creamer: What I Learned About Proper Portions
Boy, did I learn this lesson the hard way! After tracking my creamer usage for a month, I realized I was using four times the recommended serving size. No wonder my “just a splash” was adding up to serious calories!
Understanding Real Serving Sizes
Let me share something eye-opening – when I actually measured out one serving (one tablespoon) of creamer, I was shocked. What I thought was a tablespoon was actually closer to four! Here’s what I discovered about standard serving sizes:
– Regular liquid creamer: 1 tablespoon (15ml)
– Powdered creamer: 1 teaspoon (4g)
– Plant-based creamer: 2 tablespoons (30ml)
– Half & half: 2 tablespoons (30ml)
The Calorie Reality Check
After measuring everything for a week, here’s what I found different creamers actually contain per serving:
– Regular liquid creamer: 35-40 calories
– “Light” creamer: 15-20 calories
– Plant-based: 25-30 calories
– Sugar-free versions: 10-15 calories
But here’s the kicker – most people use 2-4 servings per cup, and many drink multiple cups per day. Do the math, and you might be drinking 200+ calories just in creamer!
Weekly Limits That Actually Work
Through trial and error, I developed some realistic weekly guidelines:
– Maximum 2 servings per cup
– No more than 3 cups with creamer daily
– One “treat” day where I can add extra
– Stick to 1 tablespoon for regular creamers
– Allow 2 tablespoons for plant-based options
Measurement Tips That Changed My Game
Want to know what finally helped me control portions? These practical tricks:
– Use a clear glass cup to see exactly how much you’re adding
– Get a small measuring spoon just for creamer
– Mark your usual fill line on your coffee cup
– Use a milk frother to make less creamer seem like more
The Portion Mistakes I Used to Make
Let me tell you about my biggest portion control blunders:
– Eyeballing portions (always way off!)
– Adding more if coffee was too hot
– “Just a splash more” syndrome
– Not counting second cups
– Forgetting about coffee shop portions
The Coffee Shop Challenge
Speaking of coffee shops, their portions are often huge! I measured a “light splash” at my local cafe – it was almost 1/4 cup of creamer! Now I specifically request:
– “Just one tablespoon, please”
– Ask for it on the side
– Use the little creamer cups (they’re usually 1/2 oz)
My Practical Solutions
Here’s what actually works for me now:
– Pre-measure weekly portions into small containers
– Use a creamer dispenser with measured pumps
– Keep a measuring spoon with my coffee supplies
– Track creamer in my food diary
– Use a smaller coffee cup
Temperature Tricks
I discovered that coffee temperature affects how much creamer we use. Now I:
– Let very hot coffee cool slightly
– Use room temperature creamer
– Add creamer first, then coffee
– Use ice cubes made from coffee
The Adjustment Period
Fair warning – it took about two weeks for my taste buds to adjust to proper portions. But now, my old amounts taste way too rich! Some tips for adjusting:
– Reduce portions gradually over 2-3 weeks
– Try different creamer types
– Experiment with spices like cinnamon
– Focus on quality coffee that needs less creamer
Monthly Check-Ins
I now do a monthly “portion check” where I measure my usual pour against a proper serving. It’s amazing how portions can creep up if you’re not paying attention!
Remember, the goal isn’t to eliminate creamer entirely – it’s about finding an amount that lets you enjoy your coffee without overdoing it. Start measuring your portions for just one week, and you might be surprised at what you discover!
And here’s my final tip: if you find yourself needing lots of creamer, it might be time to try better quality coffee. Good coffee often needs less creamer to taste great!
Healthy Alternatives
Here’s my practical guide to healthier coffee additions, based on lots of experimenting:
Beyond Basic Creamer: My Journey to Healthier Coffee Add-ins
Can I tell you about my biggest coffee breakthrough? It happened when my doctor suggested cutting back on processed creamers. At first, I was devastated – black coffee wasn’t my thing! But after months of experimenting, I found some amazing alternatives that actually made my coffee better.
The Milk Revolution
Let me share what I discovered about different milk options:
Unsweetened Choices:
– Oat milk: My personal favorite for its natural sweetness and creaminess (40 calories per cup)
– Almond milk: Great for a lighter option (30 calories per cup)
– Cashew milk: Super creamy but watch out – some brands can separate in hot coffee
– Macadamia milk: Pricier but amazingly rich (seriously, try it!)
Here’s what I learned about using these alternatives:
– Temperature matters – warm them slightly to prevent curdling
– Barista versions blend better but cost more
– Some brands are fortified with vitamins D and B12
– Store brands can be just as good as name brands
Natural Flavor Boosters
The game-changer for me was discovering natural flavor additions. These add amazing taste without the sugar:
– Pure vanilla extract (just 2-3 drops!)
– Almond extract for a nutty twist
– Fresh orange zest (trust me on this one)
– Pure cocoa powder (unsweetened)
Spice It Up Right
Oh my goodness, the spice combinations! Here’s what worked best:
– Cinnamon (helps stabilize blood sugar too)
– Cardamom (gives a fancy coffee shop vibe)
– Nutmeg (just a tiny pinch)
– Pumpkin pie spice (not just for fall!)
My favorite spice blend recipe:
– ¼ teaspoon cinnamon
– Pinch of cardamom
– Tiny pinch of nutmeg
– Sprinkle of ginger
Mix these together and store in a small jar – one shake is perfect per cup.
Smart Sugar Substitutes
After trying literally every sugar substitute out there, here’s what I found actually works:
– Monk fruit drops (no bitter aftertaste)
– Pure stevia extract (but be careful – a little goes a long way)
– Date paste (natural and adds richness)
– Allulose (tastes most like real sugar)
The Dairy-Free Revolution
For those avoiding dairy, I’ve tested tons of alternatives:
– Coconut cream (just a tiny amount adds richness)
– Hemp milk (great omega-3 source)
– Pea protein milk (surprisingly creamy)
– Homemade nut milk blends
My Go-To Morning Mix
Here’s my current favorite healthy coffee addition:
– 2 tablespoons barista oat milk
– 1 drop vanilla extract
– Pinch of cinnamon
– Tiny drizzle of date syrup
Total calories: about 25
Taste-Adapting Tips
Remember, your taste buds need time to adjust! I gradually transitioned over three weeks:
– Week 1: 75% regular creamer, 25% alternative
– Week 2: 50/50 mix
– Week 3: 25% regular creamer, 75% alternative
– Week 4: Full switch to alternatives
Problem-Solving Guide
Some common issues I encountered and how to fix them:
– Separation: Use barista versions or warm slightly
– Not creamy enough: Add a splash of coconut cream
– Missing sweetness: Try monk fruit drops
– Weird aftertaste: Switch brands or try a different base
Cost-Saving Tricks
Health alternatives can get pricey, so here’s how I save:
– Make my own nut milk blends
– Buy in bulk when possible
– Watch for sales on shelf-stable options
– Keep powdered versions as backup
Remember, the goal isn’t to make your coffee taste exactly like it did with traditional creamer – it’s to find new, healthier flavors you actually enjoy. Give your taste buds time to adjust, and you might be surprised at what becomes your new favorite!
And here’s my final tip: invest in really good coffee beans. When your coffee tastes amazing to begin with, you need less stuff to make it delicious!

Making Smart Choices
Here’s my practical guide to choosing and using coffee creamers wisely:
Smart Creamer Choices: Lessons From My Label-Reading Journey
Let me share something embarrassing – I used to just grab whatever creamer was on sale without checking the label. After a health scare made me start reading ingredients, I was shocked at what I’d been putting in my coffee! Here’s what I’ve learned about making smarter creamer choices.
The Label Detective’s Guide
After spending way too much time squinting at tiny print, I’ve developed a solid system for label reading:
First Ingredients Matter:
– Water should be first (not corn syrup!)
– Real cream/milk in the top 3 for dairy versions
– Avoid anything with hydrogenated oils up front
– Watch for hidden sugars in multiple forms
The eye-opening part? Many “natural” creamers had more artificial ingredients than regular ones!
Brand Breakdown Reality
I actually created a spreadsheet (yes, I’m that person now) comparing different brands. Here’s what surprised me:
– Store brands often had cleaner ingredients
– Premium prices didn’t always mean better quality
– Organic labels didn’t guarantee healthier ingredients
– Some “specialty” brands had more additives than basics
Quality Clues You Can Trust
Through lots of trial and error, I’ve learned to spot real quality indicators:
– Short ingredient lists (under 10 items)
– Recognizable ingredients
– Clear allergen labeling
– Transparent sourcing information
– Proper certification labels
Storage Secrets That Save Money
After throwing out too many spoiled creamers, I figured out proper storage:
– Keep temperature steady (back of fridge, not door)
– Note opened date on container
– Use within 7-10 days once opened
– Don’t let sit out during breakfast
– Never return unused portions to container
The Real Cost Analysis
Here’s what I learned about creamer economics:
– Cheaper brands often need more per cup
– Premium options might be cheaper long-term
– Homemade alternatives can save 50%
– Bulk buying isn’t always smart (spoilage!)
My Price Comparison Method:
– Calculate cost per serving (not just per bottle)
– Factor in how much you actually use
– Consider shelf life
– Include any waste from spoilage
Common Red Flags I Now Watch For:
– Artificial colors (totally unnecessary)
– Multiple types of sugars listed
– Vague terms like “natural flavors”
– Missing or unclear nutrition facts
– Unrealistic serving sizes
The Freshness Factor
Quality indicators I check before buying:
– Manufacturing date (not just expiration)
– Package integrity
– Color uniformity
– Proper sealing
– Clear lot numbers
Smart Shopping Strategies
My current approach to creamer shopping:
– Compare unit prices
– Check ingredients first, price second
– Buy smaller containers initially
– Rotate brands to compare quality
– Stock up only on proven favorites
Temperature Considerations
I learned this matters more than you’d think:
– Check store refrigeration temperatures
– Watch for signs of freezing
– Avoid brands that seem unstable at room temp
– Consider shelf-stable options for backup
The Long-Term Value Equation
What I consider for overall value:
– Health impact
– Actual usage amount needed
– Storage requirements
– Personal enjoyment
– Cost per serving
My Money-Saving Tips:
– Track sales cycles (usually every 6-8 weeks)
– Use store loyalty programs
– Compare across different stores
– Consider online bulk options
– Watch for seasonal variations in price
Remember, the cheapest option isn’t always the most economical, and the most expensive isn’t always the best quality. It took me months of trial and error to find my sweet spot between quality and cost, but it was worth the effort!
Conclusion:
And here’s my final tip: keep a small log of what works and what doesn’t. It saves you from repeatedly buying products that end up being disappointing!