Introduction:
This is a paragraph.
Want to know a shocking stat? Studies show that people who meal prep consume an average of 137 fewer calories per day and save over $1,200 annually on food costs! I’ve been meal prepping for years and helping busy professionals transform their lunch routines. Trust me, your lunchtime decisions can make or break your weight loss goals! Ready to revolutionize your midday meals? Let’s dive into the ultimate guide to lunch meal prep that’ll keep both your waistline and taste buds happy!
High-Protein Power Bowl Prep Ideas
Let me share my journey with meal prepping protein bowls – something that totally changed my weekday lunch game after years of sad desk salads and expensive takeout.
Back when I first started making power bowls, I made the rookie mistake of just throwing random ingredients together without thinking about portions. Trust me, there’s nothing worse than ending up with a bowl that’s either way too light to fuel your afternoon or so heavy it puts you in a food coma. Through lots of trial and error, I’ve figured out the perfect formula: 1 cup of cooked grains, 4-6 ounces of protein, 1.5 cups of vegetables, and about 2 tablespoons of sauce.
For the protein base, chicken breast has been my go-to workhorse (about 35g protein per serving), but I’ve discovered some game-changing alternatives. Chickpeas roasted with smoked paprika and garlic powder pack 15g of protein per cup and stay crispy for days. Pan-seared tempeh (31g protein per cup) has this amazing nutty flavor that regular tofu just can’t match. The key is prepping your proteins with enough seasoning – a mistake I made way too many times when starting out.
Speaking of preparation methods, here’s what I’ve learned works best for meal prep proteins:
– Chicken breast: Slice into even 1-inch pieces and cook at 425°F for 20-22 minutes
– Salmon: 400°F for 12-14 minutes with a touch of lemon and dill
– Tofu: Press for 30 minutes, cube, toss in cornstarch, and bake at 400°F for 25-30 minutes
– Chickpeas: Drain, dry thoroughly, season, and roast at 375°F for 35-40 minutes
Now let’s talk veggies – because nobody wants soggy broccoli by Wednesday. The vegetables that hold up best for weekly meal prep are cauliflower, Brussels sprouts, sweet potatoes, and bell peppers. I learned the hard way that zucchini turns to mush after day two. For optimal roasting, toss your veggies in about 1-2 teaspoons of oil per cup, spread them in a single layer (overcrowding is your enemy!), and roast at 400°F for about 20-25 minutes.
The secret weapon that brings everything together? The sauce! I keep a rotation of three different options, all around 50-60 calories per serving:
– Lemon tahini (2 tbsp tahini, lemon juice, garlic, water) – 58 calories
– Chipotle lime (Greek yogurt, lime, chipotle in adobo) – 45 calories
– Ginger miso (miso paste, rice vinegar, ginger, sesame oil) – 52 calories
For storage, I invested in some good glass containers after a terrible experience with plastic ones that left everything tasting like, well, plastic. Here’s my tried-and-true method: layer grains on the bottom, proteins in the middle, veggies on top, and store sauces separately in small containers. This setup keeps everything fresh for 4-5 days.
One pro tip that took me forever to figure out: if you’re using avocado, don’t cut it ahead of time! Instead, keep a whole avocado at work and slice it fresh. Trust me, brown avocado can ruin even the most perfectly prepped bowl.
The best part about these power bowls? They’re incredibly customizable while still hitting that sweet spot of 25-30g protein per serving. Whether you’re looking to build muscle, maintain weight, or just have a satisfying lunch that won’t leave you scrounging for snacks at 3 PM, these combinations have got you covered.
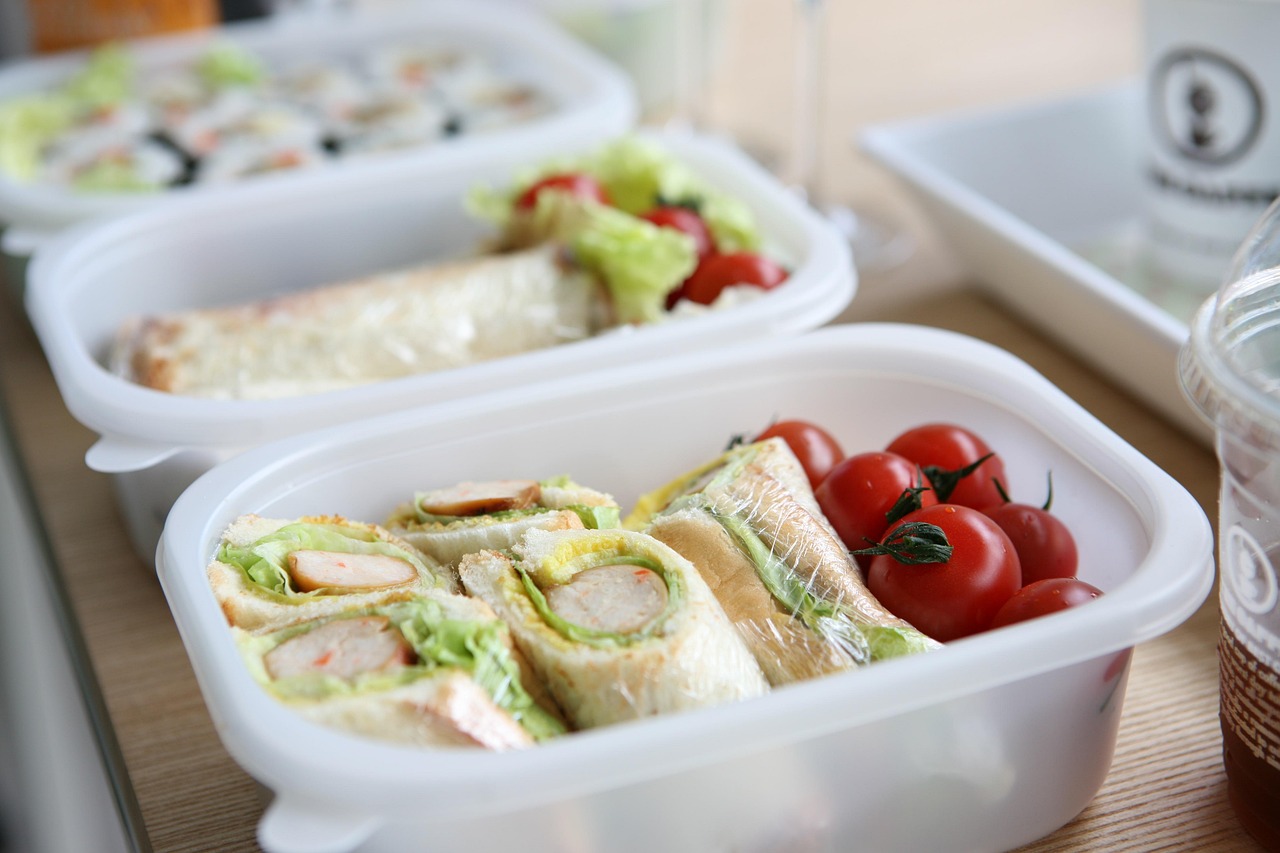
Low-Carb Lunch Container Concepts
Let me tell you about my adventures in low-carb lunch packing – a skill I definitely didn’t master overnight! After watching countless containers of soggy lettuce wraps fall apart at lunch, I’ve finally cracked the code to keeping things fresh, tasty, and actually filling.
First things first – the protein game. I’ve found that the sweet spot for a satisfying low-carb lunch is 5-6 ounces of protein, which keeps me full without feeling stuffed. My containers typically pack in around 30-35g of protein, with the carbs staying under 15g total. This ratio has been a game-changer for maintaining steady energy throughout the afternoon.
Let me share my biggest lettuce wrap breakthrough – it’s all about the architecture! After countless messy failures, I discovered that using two leaves of romaine creates a much sturdier wrap than iceberg. Layer them in a cross pattern, and you’ve got yourself a leak-proof vessel. My go-to combinations include:
– Turkey and provolone (28g protein) with pesto mayo
– Tuna salad (26g protein) with diced celery and herbs
– Chicken fajita filling (32g protein) with pepper strips
– Egg salad (24g protein) with everything bagel seasoning
For the roll-ups that have become my Monday staple, I use sliced deli meat as the wrapper instead of tortillas. Pro tip: pat the meat dry with paper towels first – something I learned after one too many soggy lunches. These roll-ups typically pack 25-30g protein per serving while keeping carbs under 5g.
Speaking of container organization, I’ve developed what I call the “bento box method” for keto-friendly lunches. The magic formula is:
– Large compartment: 4-5 oz protein (chicken, fish, or beef)
– Medium compartment: 1.5 cups low-carb vegetables
– Small compartment: 2-3 tablespoons healthy fats (nuts, cheese, or avocado)
– Tiny compartment: 1-2 tablespoons dips or dressings
Now, let’s talk about those dips and condiments because plain mayo gets boring real quick. I’ve experimented with tons of low-carb options, and these are my absolute favorites (with carb counts per 2 tablespoons):
– Garlic herb aioli (0.5g carbs)
– Buffalo blue cheese (1g carbs)
– Avocado ranch (2g carbs)
– Spicy mustard dip (1g carbs)
One mistake I made early on was not thinking about texture variety. Everything felt kind of… mushy. Now I always include something crunchy like cucumber slices, raw bell peppers, or my personal favorite – bacon bits (zero carbs and adds amazing flavor!).
For fresh vegetables that actually stay fresh until lunch, I’ve learned to strategically layer them. Cucumber slices, celery sticks, and bell peppers go on the bottom because they’re sturdier. Cherry tomatoes and softer veggies stay on top. And here’s a game-changing tip: put a paper towel in the container with your cut veggies – it absorbs excess moisture and keeps everything crisp.
Temperature control is crucial too. After ruining several expensive containers, I figured out that freezing a small water bottle and laying it alongside your lunch bag keeps everything at the perfect temperature without risking condensation ruining your carefully packed meal.
The beauty of these low-carb lunch combinations is that they’re endlessly customizable while still keeping you in that sweet spot of 5-10g net carbs per meal. Whether you’re following a strict keto diet or just trying to cut back on afternoon carb crashes, these container concepts have got your back – and your macros!
Mason Jar Salad Strategies
Listen, I’ve got to tell you about my mason jar salad journey – and yes, I learned these lessons the hard way! After countless soggy disasters and wilted lettuces, I finally cracked the code to keeping these babies fresh and crispy for a full work week.
Let me break down the layering strategy that changed everything. You know what my biggest rookie mistake was? Putting the cherry tomatoes near the top. Total disaster! Now I know better – those juicy little guys belong right at the bottom with the dressing, where their moisture actually adds to the flavor instead of making everything wet.
Here’s my tried-and-true layering formula for a quart-sized mason jar:
– Bottom layer (2-3 tablespoons): Dressing
– Second layer (½ cup): Hard vegetables (carrots, bell peppers, cherry tomatoes)
– Third layer (½ cup): Protein components
– Fourth layer (¼ cup): Softer vegetables or beans
– Fifth layer (1-2 cups): Leafy greens
– Top layer (2-3 tablespoons): Crunchy toppings (stored separately)
Speaking of proteins, let me share what actually stays fresh for 4-5 days. Grilled chicken breast chunks are reliable (dice them into ¾-inch pieces for perfect fork-ability), but my real game-changer was discovering that chickpeas marinated in lemon juice and herbs not only last – they get better with time! Hard-boiled eggs work great too, but here’s a pro tip: keep them whole until the day you eat the salad. They stay fresh longer that way.
Now, about those dressings – I had to learn this one through trial and error. You absolutely need a barrier between your dressing and greens, but here’s what nobody tells you: the amount matters just as much as the placement. I measure exactly 2.5 tablespoons for a quart jar – enough to coat everything when shaken, not so much that it drowns your ingredients. And for oil-based dressings, I add a few chickpeas or chopped carrots right into the dressing layer – they help remix the oil and vinegar when you shake it up.
The crunch factor was my white whale for months until I figured out the perfect system. Those crispy onions or nuts that make the salad special? They’ll turn sad and soft if you put them in the jar. Instead, I pack them in tiny snack-sized bags or small containers and tuck them into the lid of the jar. Some of my favorite combinations:
– Sliced almonds with sunflower seeds (¼ cup total)
– Homemade garlic croutons (store separate until eating)
– Crispy wontons (individually wrapped)
– Toasted pepitas (amazing with Mexican-style salads)
Temperature control matters more than you’d think. I store my jars upright in the fridge, never on their sides. And here’s something I discovered by accident – if you’re using cheese in your salad, cube it rather than shred it. The shreds tend to clump together, but cubes stay separate and distribute better when you shake the jar.
One thing that really upped my mason jar game was investing in wide-mouth jars. Those regular-mouth jars? They’re a pain to layer into and nearly impossible to eat from. The wide-mouth quart size is perfect for a meal-sized salad, while pint jars work great for side salads.
The best part about mastering these salads is how they’ve transformed my lunch routine. I can prep five jars on Sunday evening, and they’re still fresh and crispy on Friday. Just remember – success is all in the layering strategy and keeping those wet ingredients far away from anything that needs to stay crisp. Once you get that down, the possibilities are endless!
Essential Meal Prep Tools and Techniques
Let me share what I’ve learned about meal prep tools and techniques after years of Sunday prep sessions – including some expensive mistakes you can totally avoid!
The container situation was my first big learning curve. After wasting money on cheap plastic containers that warped in the microwave and stained with tomato sauce, I finally invested in a proper set of glass containers. My sweet spot is having twelve 3-cup rectangular containers for main meals, eight 1-cup containers for sides, and six 2-cup square ones for salads. The rectangles stack better than round ones – a lesson I learned after an avalanche of containers crashed out of my cabinet!
Let’s talk about the real MVPs of meal prep – the tools that actually make a difference:
– Large sheet pans (at least 3) for roasting multiple ingredients
– A quality chef’s knife (I suffered with dull knives way too long)
– Digital kitchen scale for portioning
– Heavy-bottom stock pot (6-quart minimum)
– Set of mixing bowls with measurements marked
– Silicone spatulas that won’t melt
– Food processor for bulk chopping
The time-saving techniques I’ve developed have literally cut my prep time in half. I arrange my prep like an assembly line: proteins first (they take longest to cook), then hardy vegetables, followed by grains. While things are cooking, I portion out snacks and prep cold items. Multi-tasking is key – I’ll have chicken in the oven, quinoa in the rice cooker, and veggies chopped for roasting all at once.
Food safety was something I learned more about after a questionable chicken incident. Here’s my non-negotiable rules now:
– Cool everything completely before containerizing (learned this after steam created condensation and spoiled food early)
– Refrigerate within 2 hours of cooking
– Keep proteins at or below 40°F during storage
– Use cooked proteins within 4 days
– Label everything with dates (masking tape and marker work great)
Batch cooking strategy was a game-changer once I figured it out. Instead of making five identical meals, I now prep components that can mix and match:
– 2-3 protein options (usually one grilled, one roasted)
– 4-5 different vegetables (combination of roasted and raw)
– 2 grain or starch options
– 2-3 different sauces or dressings
Here’s a real time-saver I discovered: marinades can do double duty. I’ll split a big batch of marinated protein, cooking half for this week and freezing half for next week. Just thaw and cook – the marinade does all the flavoring work while it defrosts.
The most essential skill I’ve developed is temperature management during prep. Hot foods need to cool quickly but safely. I portion out hot ingredients onto sheet pans in a single layer – they cool in about 20 minutes versus over an hour in a big container. This prevents that dreaded bacterial growth zone between 40-140°F.
Storage zones in your fridge matter too. I reorganize mine every prep day: prepped meals on the middle shelf, raw ingredients on the bottom (to prevent cross-contamination), and snacks/fruits up top. It’s not just about space – it’s about food safety and making sure everything stays at the right temperature.
The investment in good tools has paid for itself many times over in food savings and prep time. Sure, that food processor was pricey, but it’s saved me countless hours of chopping and probably prevented some serious knife injuries! Plus, quality tools last – I’m still using the same glass containers from three years ago, while I went through sets of plastic ones every few months.
Remember, you don’t need to buy everything at once. Start with the basics – good containers and a quality knife – and build your collection as you develop your prep routine. Your future self will thank you for investing in the right tools now!
Smart Prep and Planning Strategies
Let me share my system for meal prep planning that I fine-tuned after way too many weeks of overbuying produce and underestimating portions. It’s all about strategic planning – something I definitely didn’t get right at first!
The weekly planning rhythm that finally clicked for me starts with a “fridge audit” every Thursday night. I check what’s left, what needs using up, and what worked well that week. This timing lets me build my shopping list on Friday and hit the store early Saturday morning when the produce is freshest. Sunday becomes pure prep day – no more trying to squeeze it in after work when I’m already tired!
Here’s what I’ve learned about storage times that really helps with planning:
– Cooked chicken: 3-4 days max
– Roasted vegetables: 4-5 days
– Cooked grains: 5-6 days
– Cut raw vegetables: 3-4 days
– Prepared salads (undressed): 4-5 days
– Mixed meals (like stir-fry): 3-4 days
The make-ahead versus assemble-later decision was a game-changer. Some things I always prep ahead:
– Proteins (marinated and cooked)
– Roasted vegetables
– Grains and legumes
– Sauces and dressings
But these I’ve learned to keep separate until eating day:
– Fresh herbs (they turn brown so fast!)
– Avocado (we all know why)
– Crunchy toppings
– Delicate greens
Let’s talk money-saving strategies because meal prep can get expensive if you’re not careful. I focus on what I call “flexible proteins” – ones that can work in multiple dishes. Chicken thighs instead of breasts (about 40% cheaper), canned tuna, and bulk-bought tofu have become my go-to options. For vegetables, I always check what’s in season – it’s usually 30-50% cheaper than out-of-season produce.
You know what helped me the most with maintaining variety? Creating a “base recipe” system. I keep five basic preparations in rotation:
– Grain bowls (switch up grains, proteins, and sauces)
– Salads (rotating greens and toppings)
– Stir-fry bases (different proteins and vegetables)
– Sheet pan meals (endless combinations)
– Protein + 2 sides (mix and match)
One of my best discoveries was the “component prep” method. Instead of making complete meals, I prep versatile ingredients that can be mixed and matched. This means cooking:
– 2-3 proteins in different styles
– 4-5 vegetable preparations
– 2 types of grains or starches
– 3 different sauces
This approach lets me create different combinations throughout the week, avoiding that dreaded “same lunch every day” fatigue. Plus, if something runs out early, I still have other components to work with.
The shopping strategy that’s saved me the most money is building my list around overlapping ingredients. If I’m buying fresh herbs for one dish, I plan another dish that uses them too. Same goes for special ingredients like specific spices or condiments – they need to work in at least two different meals to justify the purchase.
Temperature management during shopping matters too – something I learned after too many wilted greens. I keep a cooler bag in my car and shop in this order:
– Shelf-stable items first
– Produce second
– Cold items last
– Frozen foods absolute last
My final breakthrough was creating a prep sequence that maximizes efficiency. While the oven preheats, I chop vegetables. While proteins cook, I prep containers and mix sauces. It’s like a choreographed dance now, and I can get through a week’s worth of prep in about 2-3 hours, down from the 5+ hours it used to take me!
Conclusion:
Successful weight loss isn’t just about what you eat – it’s about being prepared for success! With these lunch meal prep ideas, you’ll never have to worry about making poor midday food choices again. Remember, the key is starting simple and building your prep routine gradually. Ready to transform your lunches and your weight loss journey? Your next meal prep session could be the beginning of a whole new you!